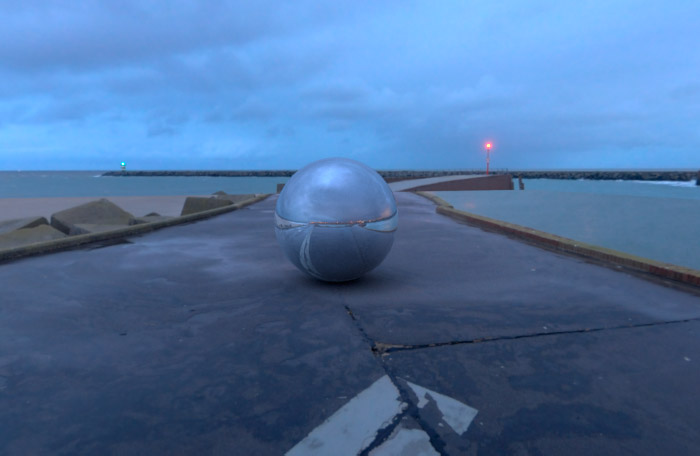
This image shows the environment map that we are going to use for the example. You can see that the pier on the left curves to the left.
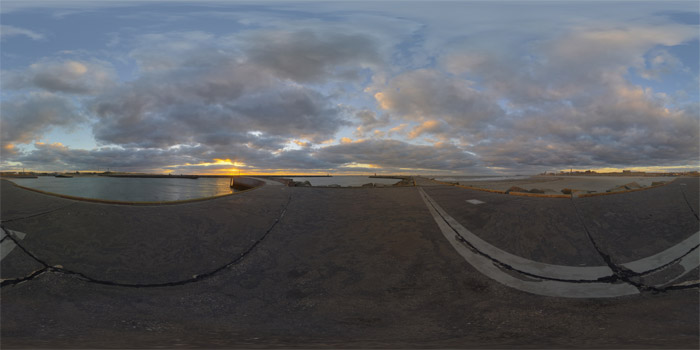
An example of texture for the environment
The common workflow suggests that we insert the file path of the image that we want to use as environment in the image type name slot, choosing image file from the type menu.
In the following image you can see the result in the viewport of the file loaded through the mentalraylbl node. Notice how the pier curves to the right instead of curving to the left as it should be.
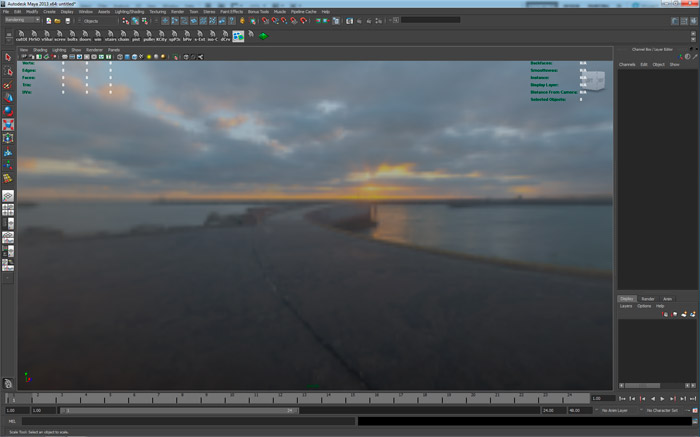
The viewport result of the use of mentalrayIbl with "Image File"
Why is this a problem?
This inversion leads, among other thigs, to a difficult control of the environment because there is no consistency between what we see in the viewport and the image that we choose.
In most cases this is not a big problem and is hardly noticeable. However if we need to edit the environment map in photoshop for example we'd have to do the changes thinking invertedly, which is not always easy.
The situation complicates if we have to insert an object in the environment.
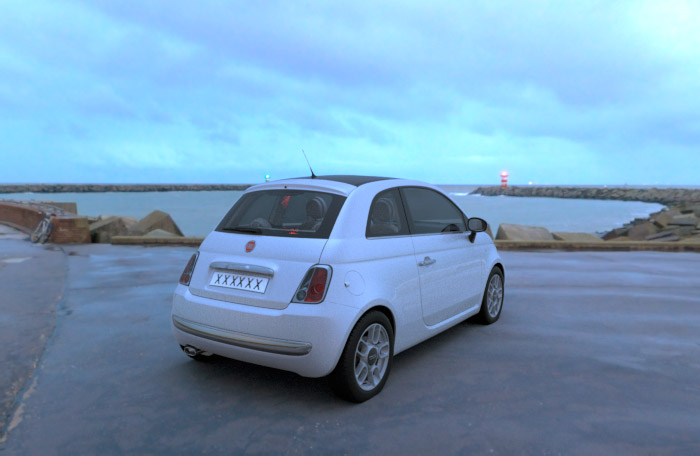
The tecnique that I use most of the time consists in creating a plane with mip_matteshadodw material on which I lay the objects so as to capture the shadows and reflexes of the CG objects.
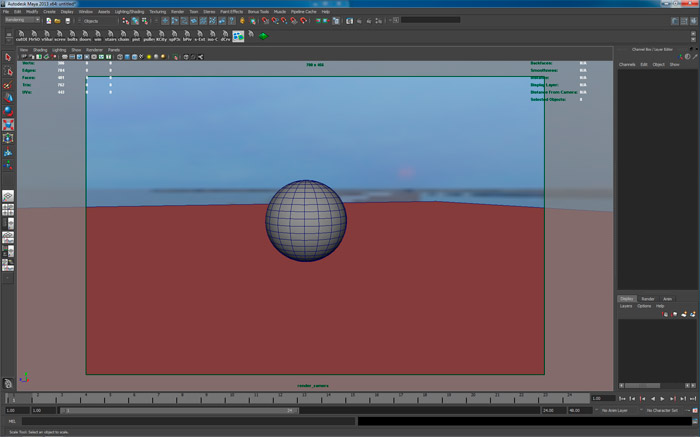
View in the viewport of an object that needs to be integrated with the background.
To make it work you need to assign the same environment map used in mentalraylbl to the background slot of the mip_matteshadow, using the mib_lookup_spherical. I chose this node beacuse it allows a spherical mapping of our texture.
And now the problem is obvious.
The background plane with the mip_matteshadow and the one of the mentalraylbl don't overlap!
The background appears to be separate at the end of the plane
As an alternative we could use the mib_lookup_spherical even for the background but this appears only in the render because it doesn't give a preview in maya's viewport and the "rotation" attribute is measured in radians making it even less intuitive.
How to solve the problem
There is a workaround that allows to solve the problem quite easily:
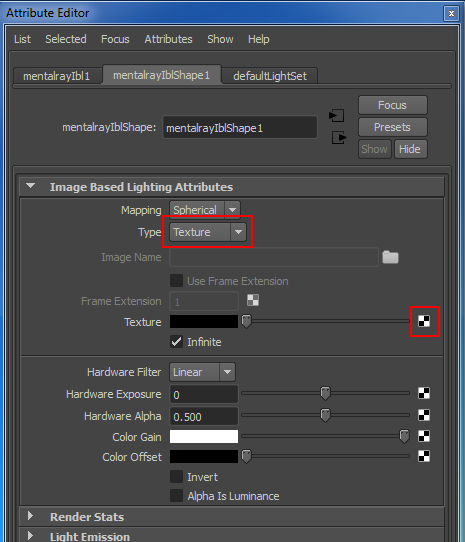
Attribute editor of the mentalrayIbl node.
- select on Type > Texture;
- create File Texture node;
- load here the environment image;
- attach the texture file to the texture slot of the ibl. At this point the preview will be shown in the viewport but it is still going to be inverted;
- in the place2dTexture of the texture file node, insert -1, 1 on repeat uv. Now the image will be oriented correctly
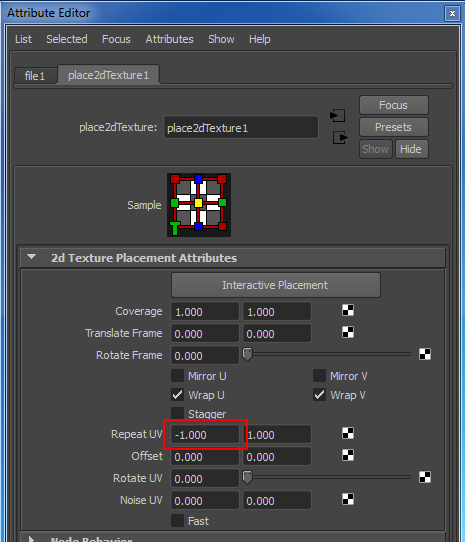
Attribute editor of the place2dTexture node with the inverted U coordinates.
Inverting the repeat Uv value in place2dTexture brings the map to its correct orientation keeping the possibility of having the preview of the environment which is a typical feature of the IBL node in maya.
As you can see the problem is solved, the pier curves correctly to the left.
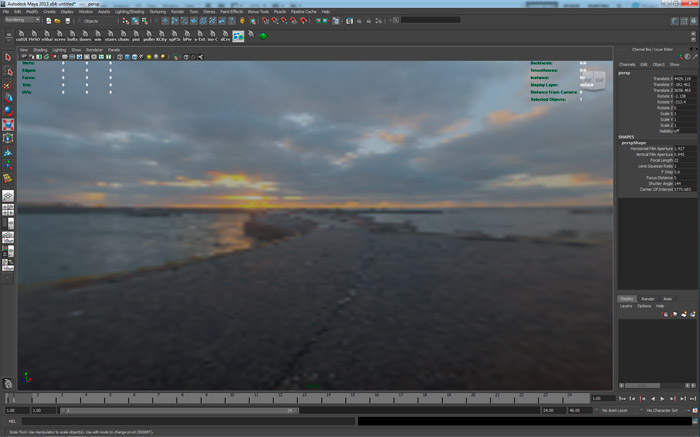
Viewport result of the use of mentalrayIbl with "texture" e "file texture"
Now even the integration between object and background works.
Happy rendering!
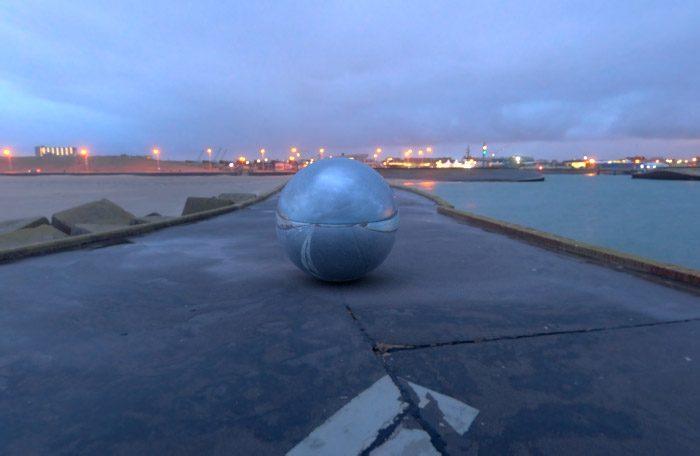
The background is now continuous and the object is perfectly integrated.


